Friday, May 4, 2012

Wild Onions!

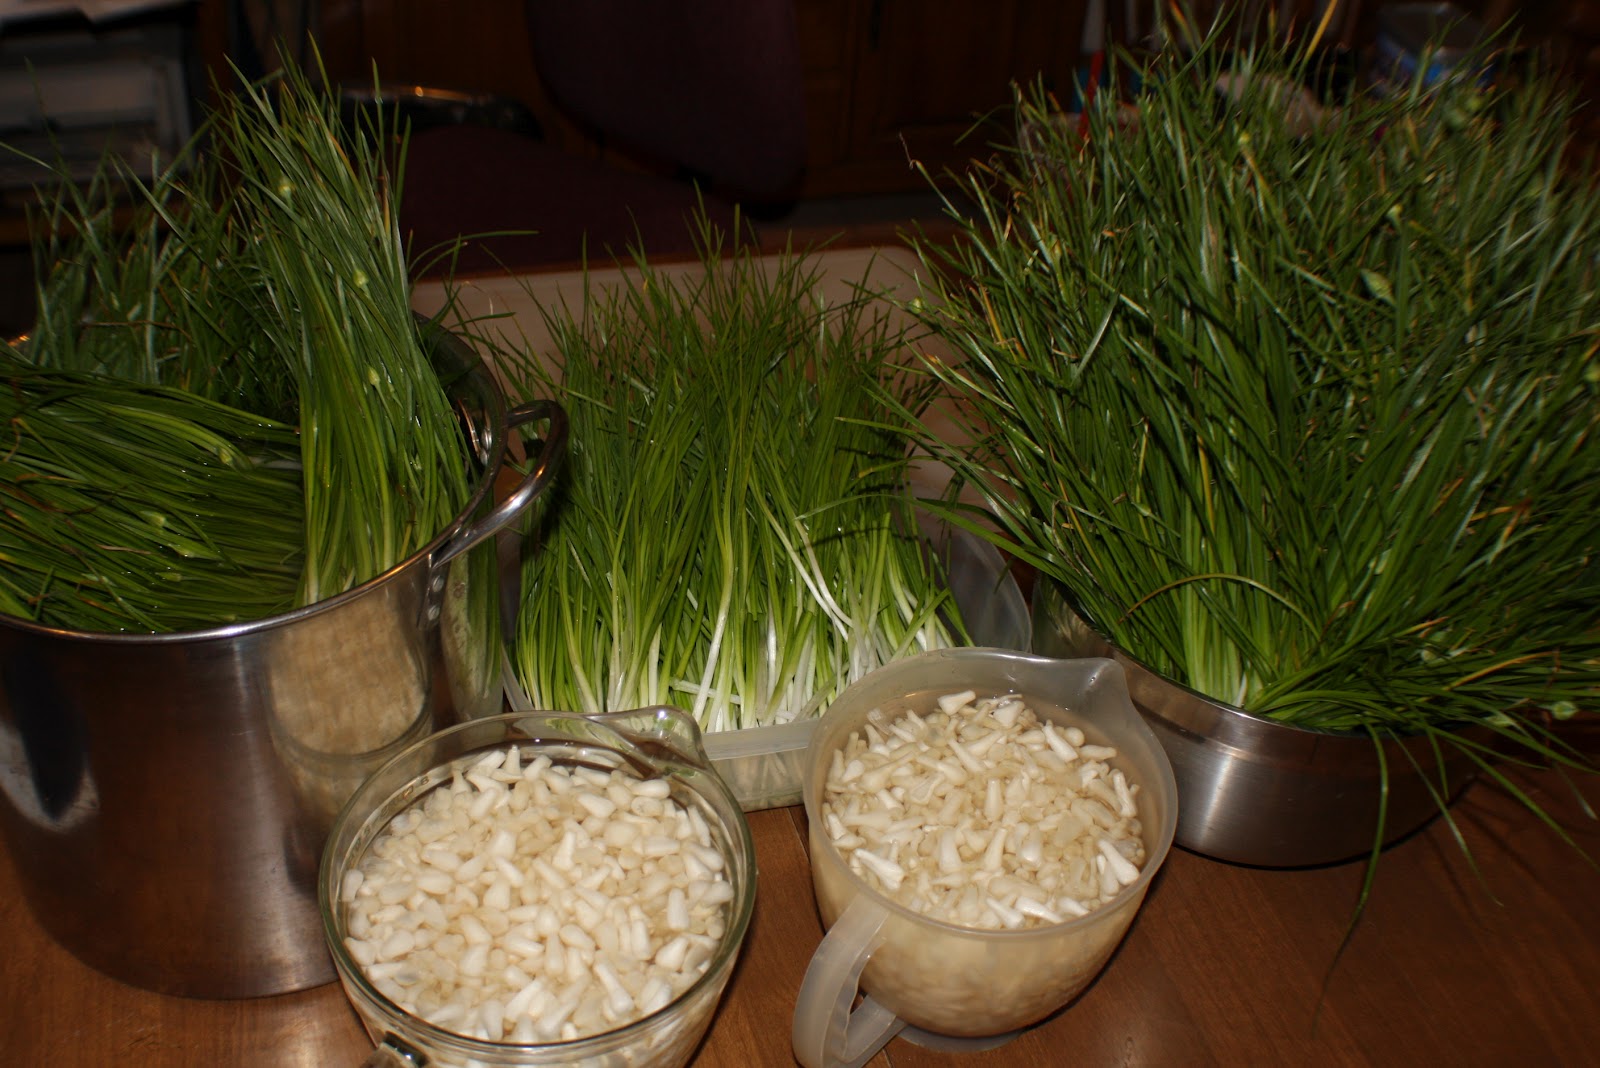
So a few weeks ago, I decided to make use of the copious amount of wild onions growing in our yard. I started digging them up, but was rather slow. My dad came out and started going crazy with the shovel and got me over two 5 gallon buckets full of beautiful smelling greens and bulbs. Between my mom and I, we spent the entire day cleaning and cutting onions. In the end, we got I don't know how many greens, but ended up with a whole gallon of bulbs.


Since I couldn't find much by way of recipes specifically for pickling wild onions (read as nothing), I decided to substitute them into recipes calling for pearl onions. I didn't have enough onions to make a whole batch of all three types I wanted to try doing, so I made 3 small small batches. We'll be tasting them this weekend, so I'll let ya'll know how that goes when the time comes. In order to use both the tops and bottoms, I dehydrated the greens. My mom said the one thing they cooked them with, they worked great. I'll have more info on both subjects after the weekend.

The first batch is the one I did the biggest group of. It's from here. For some ridiculous reason, one of the jars decided to crack in half right below the threads of the jar. I don't know how it happened, or why, but I was putting jars in the water bath canner, turned around, looked back and saw onions floating. Kind of strange experience there. Anyway, here's a picture of some of them.


The second batch was done with this recipe. They're the yellowish golden ones. The third batch, I did one 3/4 pint jar of because we weren't sure how it would taste. The recipe for that is here. It's in the jar in the back right corner with the silver band on it.


So far, my dad and brother both love the first batch of them. I wasn't too fond of it, but then again, I don't really like pickled onions. They haven't tried the second and third yet. I gave some of the first two batches to my grandpa to try. I'm still waiting on a response there.

Friday, March 9, 2012

Canning Beets, Grapefruit Juice, and Japan Plum/Kumquat ?'s...

So first off, we have a ton of fruit, etc trees/plants in our yard. Plum, pecan, grapefruit, orange, satsuma, tangerine, 2 kinds of kumquats, 3 or 4 kinds of figs, 2 kinds of persimmons, Japan plums (aka loquats), blackberries, 2 kinds of muscadines, you get the idea. For the most part, I can come up with multiple things to do with all these. I'm stumped on a few though. I love to eat Japan plums right off the tree, but there's got to be other stuff to do with them. I've looked online and come across a few recipes for cooking with them, and a good bit on jam/preserves. I even saw one with packing them in salt for 10 years before you eat them.

Has anyone ever tried these? Do you have any other/better suggestions? Can I just hot/raw pack them and put them in fruit salad? Run them through the dehydrator for a snack?

I have a similar question with kumquats. We have 2 kinds of these - one sweet, one sour. I don't eat them, but I do make kumquat/orange marmalade for my parents and brother to eat. I've dehydrated them once, and they made a crunchy snack my brother and dad liked. Got any other suggestions for canning? Think I could slice them up, hot/raw pack them and use them in fruit salad year round? I hate having food go to waste in the yard, but I'm stumped.

Now, to share what I actually did can a few weekends ago.

19 quarts of grapefruit juice. I don't drink it, I hate grapefruits, but my brother loves it. The tree is huge, and I barely touched it to get the 15-20 gallons of grapefruits we used.


I also did a batch of pickled beets that same weekend. I didn't have any fresh ones, so I used store bought canned stuff (sigh) but they work just as well. Santa brought a ton of the Tattler canning lids for the holidays this past year, so now I can stick them on just about everything I can this year. :)


And just cause my daddy took a picture of it for me to put up here: I present the rack of canned/dried food. It's not as packed as it was before Christmas, but it's getting filled up again. I didn't have room for the ~100 quarts of pears I hot packed last year on there, so they have floor space. The majority of the remaining junk on/near the floor is plarn (plastic yarn) that I crochet with, or the bags to make it with. Sigh...I need to clean house. ;)


New Soaps and a New Mold!

So I've been wanting a big 5lb loaf mold for soaping, but the prices are outrageous. Rather than break down and buy one, I convinced my dad to help me make one from scrap wood and a few nuts/bolts from the hardware store. The result works great! I got the basics from Keith Brown's wonderful tutorials on youtube. Go check them out if you're interested in making your own mold. My dad and I edited a few things, stuck washers on the bolts before the wing nuts, etc, but basically kept the same idea. SO without further rambling, pictures!


Both ends are removable. I drilled the holes wrong on one side, so I had to put me an up arrow to know which set of holes to put on the bolt. I spent about $4 to make this between the bolts and screws. All the wood was scrap. I recommend making it the 18" suggested in the videos. That's the perfect length to put Reynolds freezer paper in and not have to cut anything. I just stuck seperate little squares on the end pieces, screwed it down tight and taped down the big middle piece. It worked great, no leaks or anything.

So, the soaps that were made (a few weeks ago now, haven't had time to post this...). I did 3 types: goats milk, shaving soap, and the loaf one. The descriptions are in this post.

Goats Milk:


Still not too fond of the look of this one, but here's the Shaving Soap:


And my favorite of all the one's I've made so far, done in the fancy new loaf mold is the Peppermint Chocolate Swirl:


What do you think, world? :P My picture taking skills haven't improved - these were done by my dad with his  fancy camera he uses to take pictures of deer and stuff when he's hunting.

Thursday, February 23, 2012

New Soaps!

Pictures to come over the weekend...but...on Sunday I made some new soaps!

Batch 3: One of them turned out really beautifully. It's coconut oil, deer tallow and olive oil. The coloring is done with cocoa powder and turmeric, swirled together and sprinkled on top with poppy seeds because I wanted to see what it looked like. I scented it with some peppermint essential oil. That was the last batch I made, and it was done in a brand new mold my dad helped me build. I made a 5lb loaf in it, but you can block it up at whatever point to make less if you want.

Batch 2: Right before Christmas, I ordered from Camden Grey Essential Oils, and they had free gifts sent out with everything. I got some bentonite clay, which I had never used before. Everything I read talked about how good it was in shaving soap, so I replaced the water in my second batch with some mint tea and added in bentonite clay. It's got beef tallow, coconut oil and olive oil in it. I used silicone cupcake molds, since my dad and brother both use the little shaving soap cups with brushes and wanted soap to fit in that. When last I checked, it was very green, rather soft and extremely minty.

Batch 1: This batch was my first attempt at goats milk soap. Apparently my grandpa has sensitive skin (didn't realize this previously), so I used this as an excuse to try goats milk soap. I used the canned stuff that's evaporated you get at the grocery store near the condensed milk. The soap came out a pretty creamy color, but I cut it with an unfriendly knife, so I had to go back over the edges with a potato peeler to smooth it out some. The shavings will eventually rebatch to become something. This soap is done with deer tallow, coconut oil and olive oil. I gave my grandpa a bar 2 days after I made it (once it had cured enough to not burn him) to see how he liked it, his response, "It feels like real soap, not the stuff you buy at the store." If I didn't know he was rather, ah, a smart aleck, I would have been hurt that he missed my explanation of how I made it. :P But he loved it.

I can't wait to try them myself, and hopefully the pictures will appear magically over the weekend. :)

Wednesday, January 4, 2012

Teriyaki Jerky

Last night I made some teriyaki jerky, as per my mother's request. It's not quite as seasoned as we wanted, so next time I'll either use only 4 pounds of meat with this much or add in some extra seasoning. As it's a good flavor, I decided to put it here for me to find again, and for any others interested.

5lbs of ground venison
1T salt
1C soy sauce
1/2C brown sugar
2t garlic powder
2t ground ginger
1t black pepper

Mix it all together with your hands in a big bowl. Shoot it with a jerky cannon, mold it with your hands or whatever way works for you. Then either use an oven or a dehydrator or a smoker to dry it out. I used my dehydrator for 8 hours at about 140 degrees. My dehydrator doesn't have the best temperature dial in the world, but I think that's the temperature it was.

This was made in Oklahoma, where humidity is nonexistent. If I were to do this in south Louisiana at home, well...8 hours just turned into about 12 or 14... :)

Tuesday, January 3, 2012

Dog Food (et al) Totes

I don't know where I first came across them, but subsequent searches have led me to find this awesome use for plastic dog/cat food/deer corn bags. Since we're at the camp in Oklahoma right now, I actually have a good bit of time to work on crafty stuff. I'm trying multiple patterns out to see which I like best, and then kind of making up my own. The first came from here, and my mom and I made it like that minus the lining. Here is the result:


The second and third ones I did all by myself, as my mother was busy. The second was from here. I prefer the sides and bottom of this one over the first bag, but I like the way the picture shows better on the first one.


Third off, I made my own pattern somewhat. I used this page as a basis of a pattern. I wanted the picture of the deer to show up nicely on it, and as the pattern for this cuts out everything, I drew out what I wanted on newspaper to make it fit. This is my favorite one so far that I've done.


I want to make one of these next. I don't know that I'd put it inside out for the white like they do, unless I cannibalize a puppy food bag with a cute picture on it. 

Sigh. I need to learn to take some better pictures. Any suggestions?

Sunday, January 1, 2012

Making Deer Jerky

So last year for Christmas, my parents got me a refurbished dehydrator from LEM Products. That website/catalog is like a candy store. I want everything in it just about.
That's my dehydrator. He lives in our camp/house/remote business location in Oklahoma. I use my grandma's old one at home. Anyway.

This year, since I made a good bit of deer jerky from my dad and brother's kills last year, my parents thought this would help.
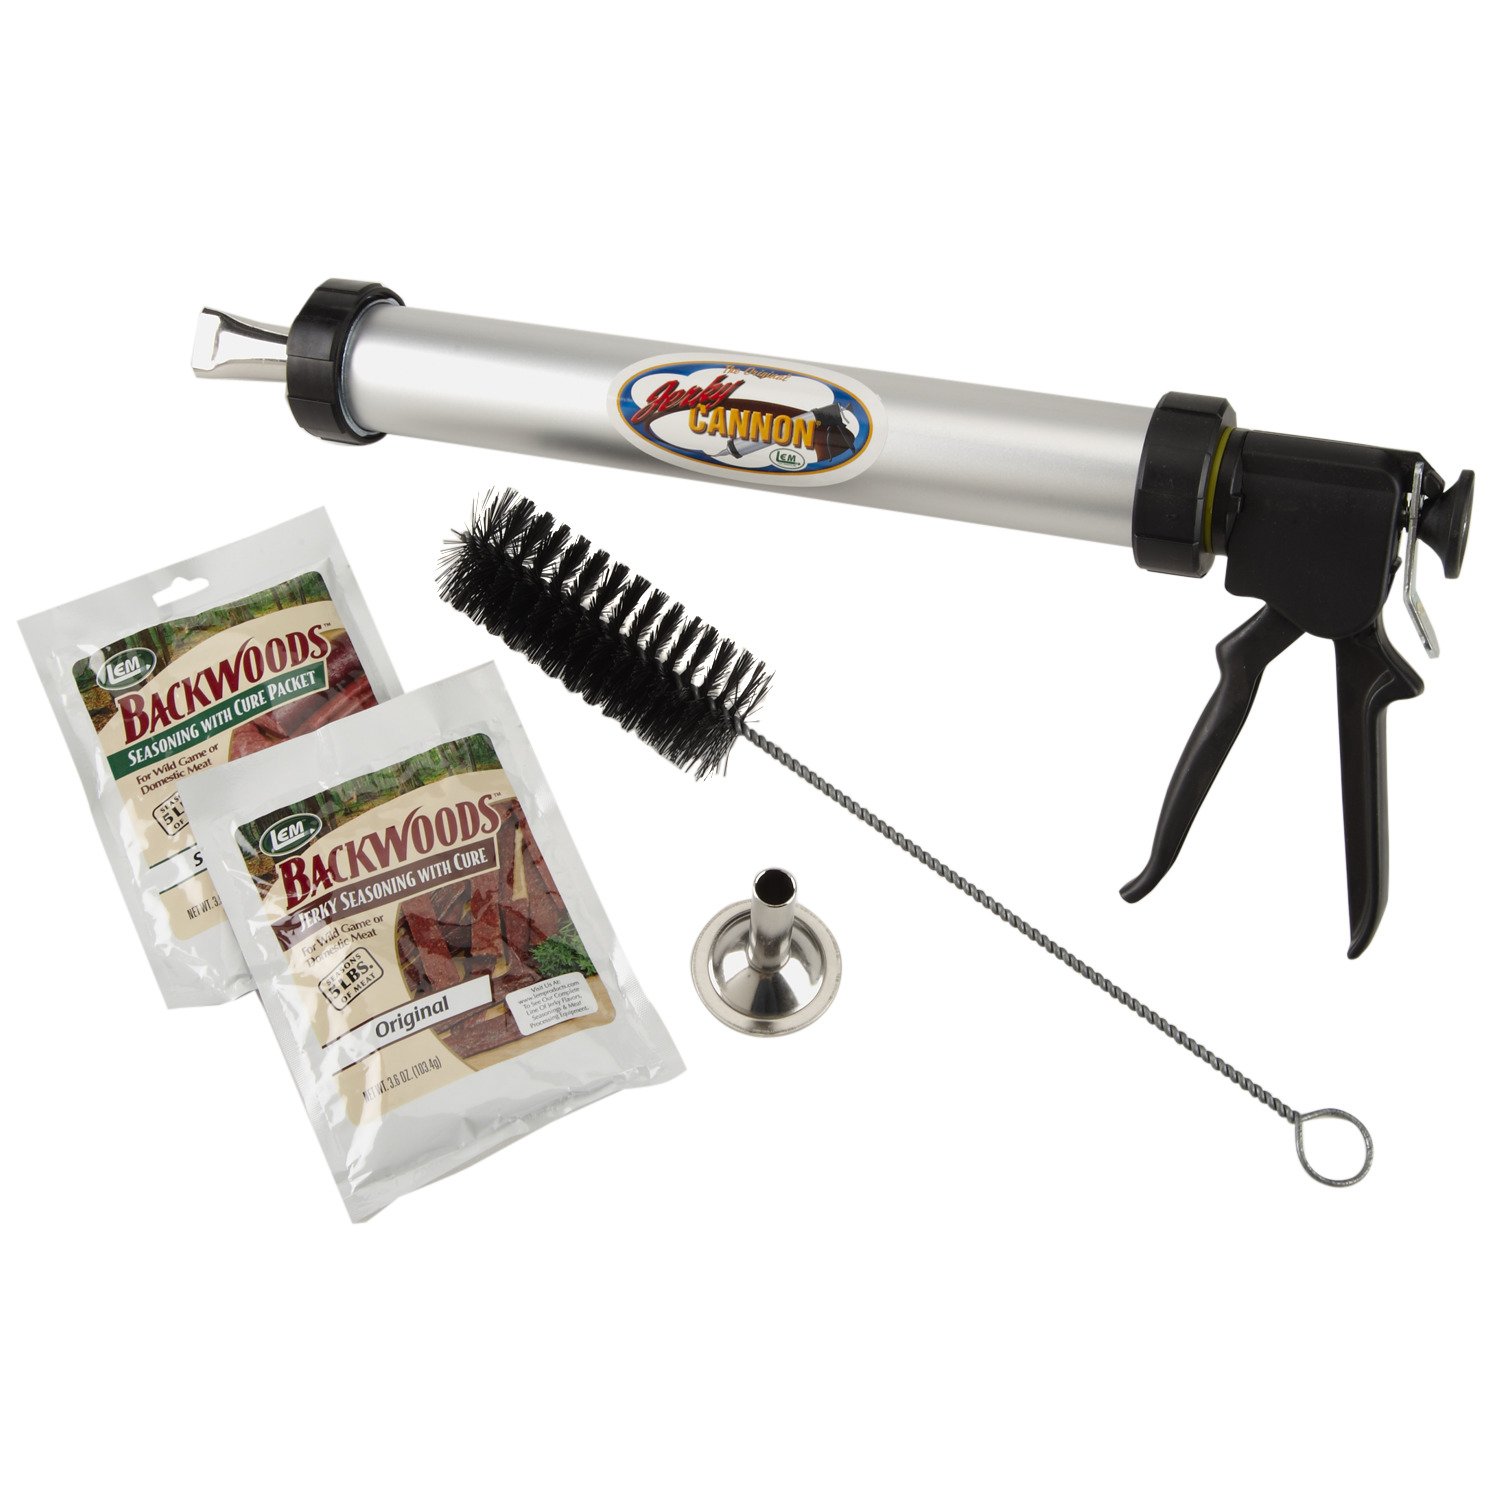
It's a jerky cannon. Holds 1.5 pounds of ground meat and you can make either flat jerky or snack sticks. It also has a bottle brush to clean it, a barrell stomper to pack the meat in, and 2 packs of LEM's seasoning (good for 5 pounds each). Naturally, I had to make all 5 pounds of the original flavor one.

The seasoning came with a cure packet in it. I know that technically you're supposed to use all that stuff, but the main reason that I got into drying and canning my own foods is because all those cures and preservatives make me sick. So we store the jerky in the freezer.

The cannon works like a cookie press. You pull the plug all the way back, pack the barrell full, put the tip you want on and go to town. Each of those sticks is 2 "clicks" with the handle/trigger thing. It took me under 2 hours to put together, season 5 pounds of meat, put it on the trays and wash up. I don't even want to think about how many hours that would have been by hand. 1 pound at a time took me long enough last year.

The LEM Original seasoning for jerky is pretty good. I'm more of a teriyaki person myself, but this was good. Normally I make my own seasonings or use the dry rub stuff (bbq, lemon pepper, steak seasonings, etc.) My brother likes all the weird stuff, so I make it for him.

I dried these too long when I did them, since I was worried that they might not be done enough I guess. Next time, a bit shorter would be better. The dog doesn't care though. He likes it just the way it is.

(He was chasing my brother's eggnog.)